
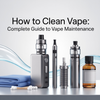
How to Clean Vape: Complete Guide to Vape Maintenance

Why Cleaning Your Vape Matters
Let's be honest—when you first got your vape, you probably didn't think much about maintenance. But here's the thing: regular cleaning isn't just about being tidy. It's about getting the most out of your device and enjoying every puff the way it's meant to taste.
Think of your vape like a coffee maker. If you never clean it, eventually everything starts tasting off, right? Same concept here. Regular vape maintenance preserves those crisp flavors you love—especially if you’re enjoying a Granddaddy Purple vape — extends your device's lifespan (saving you money), and keeps everything hygienic. Nobody wants to inhale through a mouthpiece covered in week-old residue. Keeping your vape in top condition is easier than you think, and your taste buds will thank you.
Signs Your Vape Needs Cleaning
Your vape has ways of telling you it needs attention. Here's what to watch for:
Burnt or muted flavor: If your favorite e-liquid suddenly tastes like burnt popcorn or just... nothing, that's vape residue buildup talking. E-liquid residue accumulates on coils and inside tanks, muting those flavors you paid good money for.
Gurgling or popping sounds: Your vape shouldn't sound like it's drowning. These noises usually mean liquid has gotten where it shouldn't be, often due to buildup in the airflow.
Leaking vape tank: Sticky pockets? Puddles in your bag? Leakage often happens when residue prevents proper sealing between components.
Reduced vapor production: If your clouds have turned into sad little wisps, blockage from buildup is probably choking your airflow.
Sticky residue or e-liquid buildup: If you can see or feel gunk on your device, it's definitely time for a deep clean vape session. This is the most obvious sign that your vape care routine needs attention.
What You'll Need Before You Start
Good news—you probably have most of these tools needed to clean a vape already at home:
-
Paper towels or microfiber cloth: For wiping down surfaces
-
Isopropyl alcohol (90% or higher): The MVP of vape cleaning. Higher concentration means faster evaporation
-
Cotton swabs: Perfect for those tight spots and connection points
-
Warm water & bowl: For soaking and rinsing components
-
Small brush or soft toothbrush: Gets into threading and hard-to-reach areas
- Optional: vaporizer cleaner – Commercial cleaning solutions designed specifically for vapes.
Important safety note: Never, and I mean never, soak electrical parts like your battery or circuit boards. Water + electronics = bad day. Keep those components dry and you'll be fine.
How to Clean a Vape: Step-by-Step Guide
Let's break this down by component. You don't always need to clean every part every time, but knowing how to clean your vape or 1 gram cart properly means you can tackle whatever needs attention.
How to Clean a Vape Tank
Your tank is where most of the action (and mess) happens. Here's how to clean vape tank components properly:
Disassemble carefully: Unscrew the tank from your battery first. Then separate the tank into its parts: top cap, glass, base, and coil. Keep track of o-rings—those little rubber seals love to roll away.
Rinse with warm water: Hold each piece under warm (not hot) running water. Let the water flow through all the nooks and crannies. You'll be amazed how much gunk comes out.
Deep clean if needed: If water alone doesn't cut it (sweet or darker e-liquids leave stubborn residue), let components soak in a bowl of isopropyl alcohol for 10–15 minutes. The alcohol dissolves that sticky e-liquid residue like magic — a simple trick every cheap vapes user can rely on to keep their device clean and performing smoothly.
Dry completely: This is crucial for vape tank maintenance. Shake off excess water, pat dry with paper towels, then let everything air dry for at least 30 minutes. Water droplets in your tank will dilute your e-liquid and affect flavor.
How to Clean Vape Coil
Coils are tricky because they have a limited lifespan. Here's the honest truth about cleaning vape coil components:
Know when to replace vs. clean: If your coil is blackened, crusty, or over two weeks old with heavy use, just replace it. Coil cleaning only works for relatively new coils with light buildup.
The rinse method: Remove the coil and rinse under warm water, letting it flow through the cotton and around the wire. Gently blow through it (opposite direction of airflow) to clear debris.
Dry burn technique (advanced users): If you have a rebuildable coil, you can pulse power through it without cotton to burn off residue. Watch for even glowing and stop if it gets too hot. This method requires experience—skip it if you're new to vapes or using advanced devices like the Blue Dream vape.
Let it dry: Even if cleaned, let coils dry for several hours or overnight before use. Wet cotton in a coil will not fire properly.

How to Clean a Vape Pen
Vape pens are popular because they're compact, but that means residue can build up in small spaces. Here's how to clean a vape pen effectively:
Disassemble safely: Remove the mouthpiece, unscrew the tank, and separate the battery section. Never try to force anything apart.
Wipe the exterior: Use a damp cloth to wipe down the outer shell. Sounds basic, but you'd be surprised how much pocket lint and grime accumulates.
Clean the threading: This is important for vape pen upkeep. Use a cotton swab dipped in isopropyl alcohol to clean the threaded connections where tank meets battery. Residue here prevents proper contact and can cause firing issues.
Check connection points: The pin where your coil connects needs to be clean and slightly springy. Gently clean around it with a cotton swab, being careful not to push it down.
How to Clean Vape Mouthpiece
Your lips touch this part with every puff, so cleaning vape mouthpiece components should be a regular habit for vape hygiene.
Soak it: Remove the mouthpiece and drop it in warm soapy water for 10 minutes. Or use isopropyl alcohol for a deeper clean that also sanitizes.
Scrub if needed: Use a cotton swab or small brush to reach inside the mouthpiece channel. You might find condensed vapor residue lurking in there.
Rinse and dry: Rinse thoroughly with clean water and dry completely. A wet mouthpiece is uncomfortable and can affect vapor quality.
Pro tip: If you're sick, clean your mouthpiece daily to prevent reinfecting yourself. Simple vape hygiene goes a long way.
How to Clean Vape Battery
Batteries are the one component where you need to be extra careful. Here's how to clean vape battery safely:
No water, ever – Seriously. Water and batteries don't mix. Even a drop can cause corrosion or short circuits.
Clean the connection – Dip a cotton swab in isopropyl alcohol and gently clean the threading and connection point where the battery meets the tank. This is where residue commonly builds up and causes problems.
Wipe the exterior – Use a slightly damp cloth (water is okay on the outside) to wipe down the battery casing. Dry immediately.
Check for damage – While cleaning, inspect for any dents, rust, or exposed wiring. Damaged batteries should be replaced immediately for safety.
Storage matters – Keep your battery in a cool, dry place. Extreme temperatures and moisture are the enemies of battery life. These vape battery care tips will help your device last longer.
How Often Should You Clean Your Vape?
The answer depends on how much you vape, but here's a solid guideline:
Light cleaning: After every refill or daily use – Quick rinse of the tank, wipe down the mouthpiece, check connections. Takes 2 minutes and prevents major buildup.
Deep cleaning: Once a week (for frequent users) or every two weeks (for occasional users) – Full disassembly, alcohol cleaning, thorough drying. This is your regular vape upkeep routine that keeps everything running smoothly.
Coil replacement: Every 1-2 weeks – Depending on your e-liquid and vaping frequency. You can't really "clean" coils back to new, despite what some people say.
Monthly inspection: Check all o-rings, look for cracks in glass, test battery performance. Replace anything that looks worn.
The question of how often to clean vape tank components really comes down to usage. If you vape heavily or use sweet e-liquids (they gunk up coils faster), lean toward weekly cleaning.
Common Mistakes to Avoid When Cleaning a Vape
I've seen people make these errors, and they can damage your device or make cleaning pointless:
Soaking the battery section: I'll repeat this until I'm blue in the face: never submerge electronics in liquid. Even "waterproof" vapes aren't meant to be soaked.
Using too much alcohol: A little goes a long way. Drowning your tank in alcohol doesn't clean it better—it just takes longer to dry and wastes product.
Not letting parts dry fully: Reassembling a wet vape means diluted e-liquid, weak flavor, and potential electrical issues. Patience here saves problems later.
Reassembling incorrectly: It seems simple until you force a thread the wrong way and strip it. Proper vape reassembly means gentle hand-tightening and making sure o-rings are in place.
Using harsh cleaners: Don't use bleach, acetone, or household cleaners. Stick to safe vape cleaning methods: isopropyl alcohol, warm water, and mild dish soap. These won't leave harmful residues.
Ignoring o-rings: Those little rubber rings seem insignificant until they're missing and your tank leaks everywhere. Keep track of them and replace them if they look stretched or cracked.
Vape Cleaning Tips for Better Performance
Want to minimize cleaning while maximizing performance? Here's how:
Use high-quality e-liquids: Cheap juice with lots of sweeteners gunks up coils faster. Premium liquids with cleaner ingredients mean less residue buildup and longer time between deep cleans.
Keep airflow vents clear: Periodically check that nothing is blocking your airflow holes. Even lint from your pocket can reduce performance.
Replace coils regularly: Don't try to squeeze extra weeks out of a dead coil. Fresh coils mean better flavor and less stress on your device. This is key for vape performance improvement.
Store your vape upright: Keeping it horizontal or upside down encourages leaking. Upright storage prevents vape leakage and keeps e-liquid where it belongs.
Don't let it sit empty: If you're not using your vape for a while, clean it thoroughly and store it empty. Old e-liquid sitting in a tank gets gross and harder to clean later.
Prime new coils properly: Let new coils soak in e-liquid for 5-10 minutes before firing. This prevents burnt taste from the start and extends coil life.
Recommended Cleaning Products & DIY Solutions
You don't need expensive specialty products to clean vapes effectively, but some options work better than others:
Isopropyl alcohol (90-99%): The gold standard for vape cleaning. It dissolves e-liquid residue, evaporates quickly, and doesn't leave harmful residue. Cleaning with isopropyl alcohol is safe when used on non-electrical components.
Ultrasonic cleaners: If you're serious about vape maintenance and have multiple devices, an ultrasonic cleaner is amazing. Fill it with water (or water + alcohol mix), drop in your tank parts, and let vibrations do the work.

Commercial vaporizer cleaners: Brands make alcohol-based cleaning solutions specifically for vapes. They work well but aren't necessary—regular isopropyl does the same job for less money.
DIY solution: White vinegar + water – Mix equal parts white vinegar and warm water for a natural alternative. It's not as effective as alcohol on sticky residue but works for light cleaning. Rinse extra thoroughly to remove any vinegar smell.
What NOT to use: Skip hand sanitizer (has additives), acetone/nail polish remover (too harsh), and anything with fragrances or moisturizers. The best vaporizer cleaning solutions are simple and pure.
Troubleshooting: Vape Problems After Cleaning
Cleaned your vape and now something's off? Here's how to fix common issues:
Vape not firing: Check that your coil is screwed in properly. Make sure the connection pin isn't pushed down too far. Verify the battery is charged and the power is on (it happens to everyone).
Gurgling or leaking: This usually means parts weren't completely dry before reassembly. Disassemble, dry everything thoroughly, and try again. Also check that all o-rings are in place.
No vapor production: Your coil might need replacement, or you might have forgotten to prime it after cleaning. Add some e-liquid and let it soak in for a few minutes.
Weird taste: If you taste alcohol, you didn't rinse or dry thoroughly enough. If it's burnt, you might need a new coil or to adjust your wattage.
Tank feels loose: Check that you didn't overtighten anything (which can damage threads) or leave it too loose. Hand-tight is perfect.
Still having issues? Restoring vape flavor and performance sometimes just requires patience. Try a fresh coil and fresh e-liquid. If problems persist, consult your device manual or vape troubleshooting after cleaning guides specific to your model.
Final Thoughts: Keep Your Vape Fresh and Flavorful
Look, cleaning your vape isn't the most exciting part of vaping. But ten minutes of maintenance each week beats the alternative: muted flavors, wasted e-liquid, and potentially having to replace your entire device.
Think of cleaning as an investment in your vaping experience. A well-maintained Delta King vape delivers better flavor, produces thicker clouds, lasts longer, and just works better overall. Plus, there’s something satisfying about a freshly cleaned device — that first puff after a deep clean hits different.
Make it part of your routine. Sunday evening while watching TV? Friday before the weekend? Pick a time that works for you and stick with it. Your vape care routine doesn't have to be complicated. Start with the basics: rinse the tank weekly, wipe down connections, replace coils when needed. That alone will put you ahead of 90% of vapers.
Keep your device clean, your flavors fresh, and your clouds plentiful. Happy vaping!
FAQs
Is it safe to clean a vape with rubbing alcohol?
Yes, use 90%+ isopropyl alcohol—it’s safe and effective for dissolving residue. Avoid electrical parts and batteries. Let all components dry fully before reassembling.
How do you clean resin out of a vape?
Soak parts in 90%+ isopropyl alcohol for 15–20 minutes, then scrub gently with a cotton swab or brush. Rinse with warm water and dry completely before use.
What is the best thing to clean a vaporizer with?
Use warm water and isopropyl alcohol. They remove e-liquid residue safely without damaging your device. Avoid harsh chemicals or scented cleaners.
Is there a way to clean a disposable vape?
Not really. Disposables are sealed units meant for single use. You can wipe the exterior and mouthpiece, but internal cleaning isn’t possible.
Why is it important to clean your vape?
It improves flavor, prevents leaks, and extends your vape’s lifespan. Regular cleaning also keeps your device hygienic and performing at its best.
How often should I clean my vape pen?
Quick clean after each refill, deep clean weekly. Replace coils every 1–2 weeks for best flavor and vapor quality.
What’s the best way to clean a vape pen mouthpiece?
Soak in warm soapy water or isopropyl alcohol for 10 minutes, then rinse and dry. Wipe daily for better hygiene and taste.
How do I clean a vape if I’ve never done it before?
Disassemble your vape, rinse non-electrical parts with warm water, let dry, then reassemble. It’s quick and easy once you do it once.
Can I use water to clean my vape pen?
Yes, for non-electrical parts only. Never submerge the battery. Always dry parts completely before using to avoid damage or weak flavor.
What’s the safest method for how to clean a vape pen without damaging it?
Use water for tanks, alcohol for connection points, and keep liquids away from batteries. Dry everything fully before reassembly.
How do I clean a vape pen cartridge or pod?
Empty it, rinse gently with warm water, and dry thoroughly. For stubborn residue, soak in alcohol briefly, then air-dry before reuse.
What should I do if my vape isn’t hitting right?
Clean the battery connection, check coil placement, and ensure proper assembly. If it’s still weak, replace the coil or charge your device.
Is there a way to unclog a vape without taking it apart?
Try blowing through the mouthpiece or taking dry pulls. If it stays clogged, you’ll need to disassemble and clean it properly.
How do I clean a disposable vape?
You can’t clean inside a disposable vape. Just wipe the exterior or mouthpiece—when performance drops, it’s time for a new one.
Why is it important to know how to clean a vape pen?
Proper cleaning saves money, prevents damage, and keeps flavor pure. It’s essential for vape performance, safety, and hygiene.
How to clean vape battery safely?
Wipe threading with a cotton swab dipped in isopropyl alcohol. Never use water. Keep batteries dry, undamaged, and stored in a cool place.
Why is it important to know how to clean a vape pen?
Proper cleaning saves money, prevents damage, and keeps flavor pure. It’s essential for vape performance, safety, and hygiene.


